Config Watch for Jira
Config Watch for Jira — User guide
Create a read-only baseline, monitor Jira configuration and investigate changes with clear before-and-after evidence.
Step 1
1. Choose a scope and create a baseline
A baseline is the reference point against which future configuration scans are compared.
A baseline is a read-only snapshot of the selected configuration. Config Watch does not edit Jira configuration and never asks you to apply a change from inside the monitoring flow.
- Open Config Watch from Jira administration.
- Select the supported configuration categories you want to monitor: workflows, custom fields and permission schemes.
- Review the category summary, then choose Create baseline.
- Wait for the status to change from Baseline in progress to Monitoring active before leaving setup.
Step 2
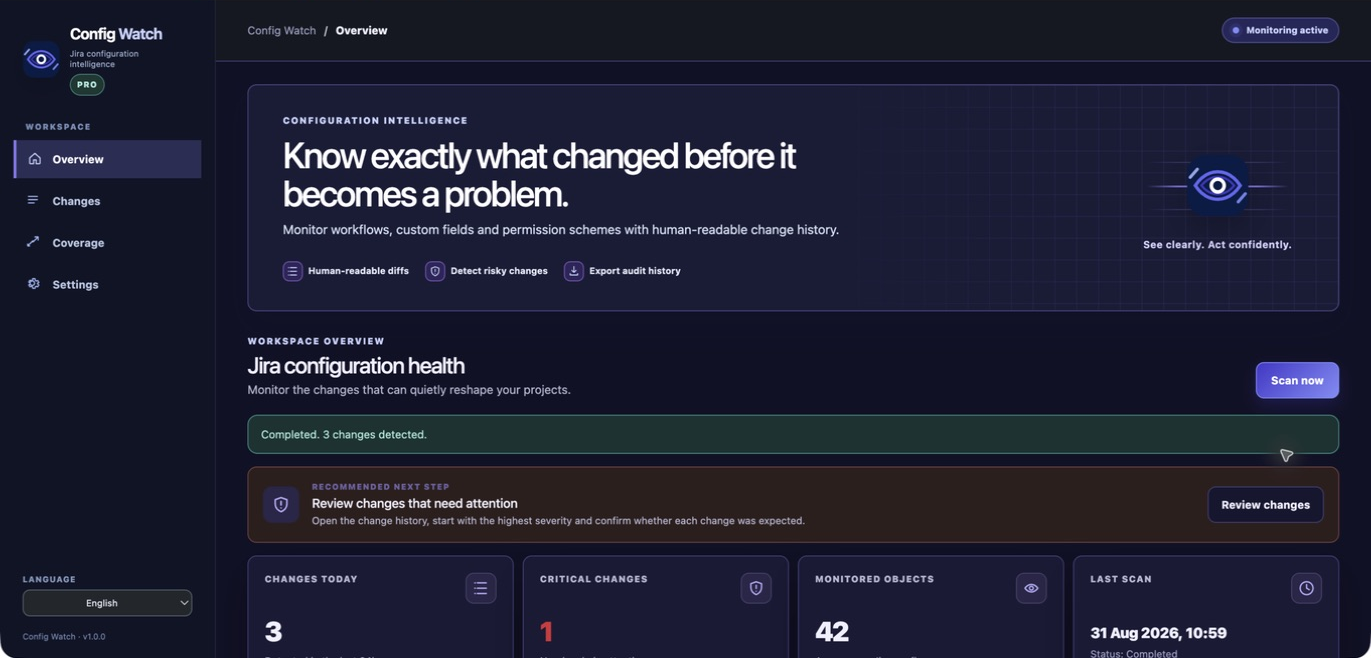
2. Run scans and understand status
Do not infer a successful scan from a spinner or a stale screen; wait for a labelled result.
Manual and scheduled scans run as queued work. The interface shows Queued, Scanning, Completed, Partial or Failed so a slow scan is recoverable rather than mistaken for a completed baseline. Refresh the page to retrieve the latest status if you navigate away. A result also carries the scan time so you can tell whether the data is current.
Step 3
3. Filter a change and read the diff
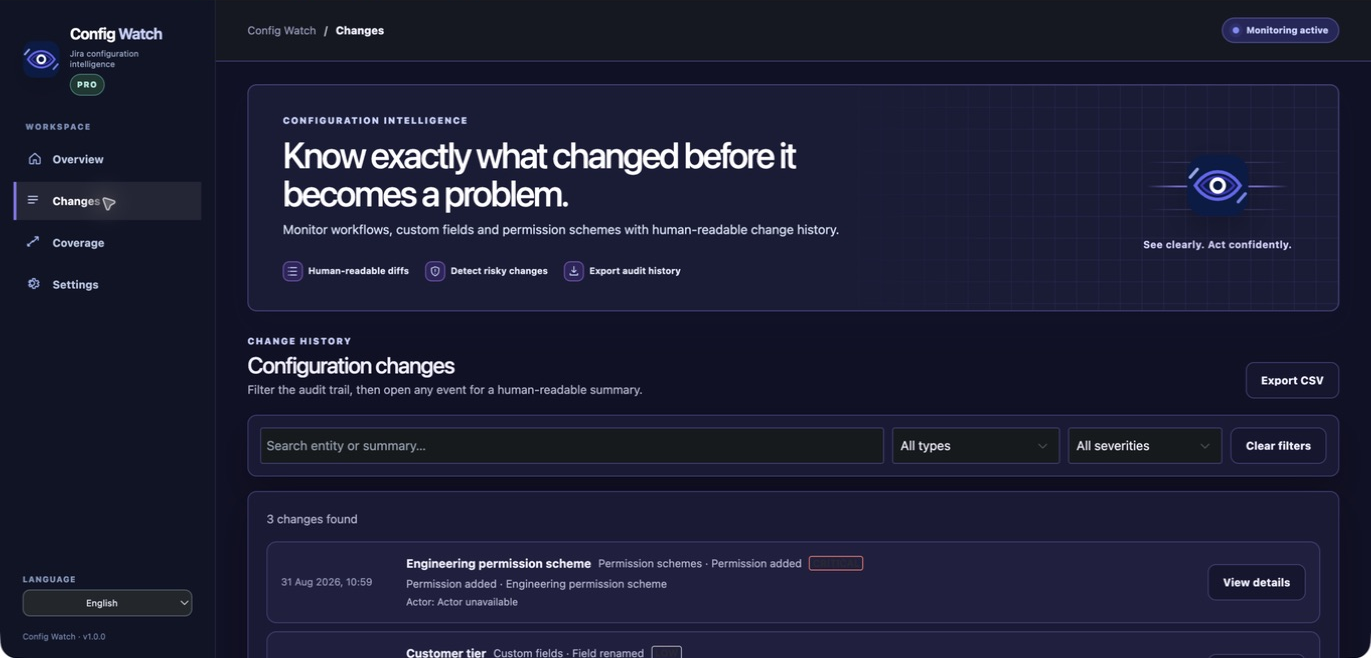
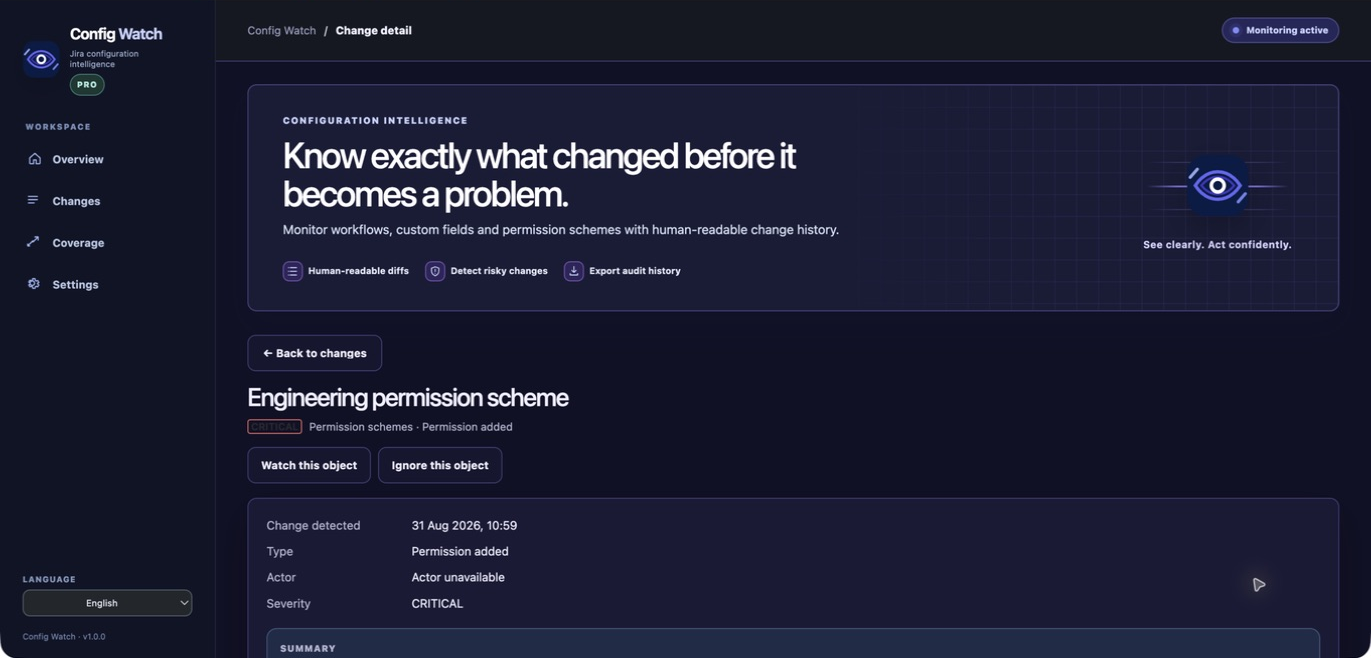
The change history is the investigation workspace: narrow the list, open an event and verify the evidence.
- Open Changes to filter by category or severity.
- Open an event to read its human-readable summary and technical before-and-after difference.
- Use Timeline to understand how an important object evolved over time.
- Add an object to Watchlist when it deserves focused review.
- Use an exclusion rule only for a known, intentional change and record the reason.
Step 4
4. Check coverage before relying on a report
Coverage is the boundary of the evidence, not a decorative status card.
Coverage shows what Config Watch currently monitors. A category labelled Not monitored is intentionally outside the current collector scope; it is not evidence that the category is being watched. Review the coverage count before relying on a report. Unsupported surfaces such as workflow schemes or screens must remain clearly labelled as unavailable until a supported collector exists.
Step 5
5. Free and Pro, side by side
Free keeps the first baseline useful and predictable. Pro is for teams that need a fuller audit surface and reusable investigation controls.
Step 6
6. Troubleshooting and support
- If setup says Baseline required, select at least one supported category and create a new baseline.
- If a scan fails, open the status message, retry once after checking Jira availability, and include the failure time in a support request.
- If a change is missing, check the selected categories, the event time and the current coverage before reporting it.
- For help, include your site URL, app version, category, approximate change time and a screenshot. Never include credentials.
See it in action
Product walkthrough
Plan boundaries
Free vs Pro at a glance
The Marketplace entitlement controls these capabilities. The app does not ask users to unlock Pro with a password, token or manual payment.
A focused baseline for trying configuration monitoring.
A supported monitoring scope and baseline Clear scan status and recent change visibility Human-readable detail for the available history
Broader monitoring and investigation controls.
Expanded coverage for supported configuration surfaces Timeline, Watchlist, exclusions and audit export Longer history and deeper before-and-after evidence
Verification
Verify the workflow
Use these checks to confirm the core workflow, the Free/Pro boundary and the safety behaviour before your team relies on the app.
- 1Open Config Watch as an administrator and choose at least one supported category.
- 2Create a baseline and wait for the status to become Monitoring active or Completed.
- 3Run a scan and verify that the result shows a real status and timestamp.
- 4Open Changes, filter by severity, then open a change detail and compare the before and after values.
- 5Open Coverage and confirm that every category is explicitly labelled Monitored or Not monitored.
- 6In Pro, use Timeline, Watchlist, exclusions and export, confirming that every action explains what it changes (or does not change).